
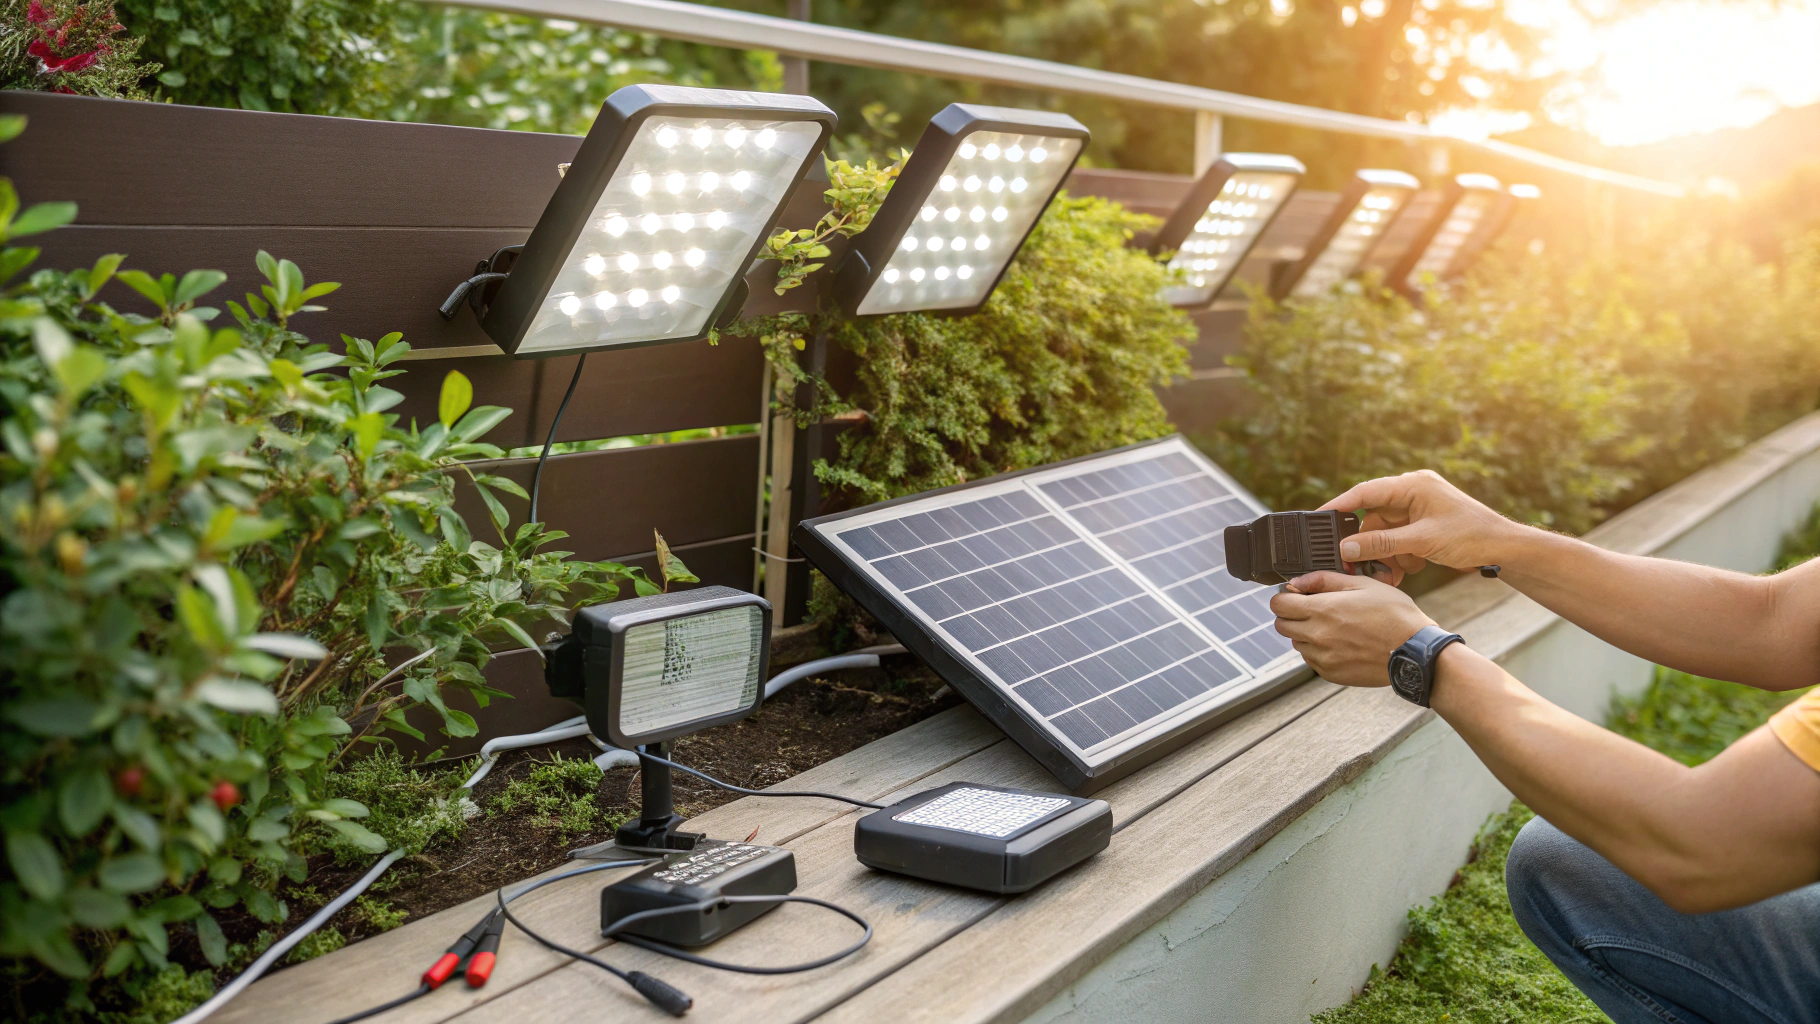
You’ll need basic tools like a drill, screwdrivers, and level to install your DIY solar security lighting system. Start by mapping your property’s key security zones and choosing south-facing locations for your solar panels at a 20-30 degree tilt. Mount your panels where they’ll receive 4-6 hours of direct sunlight, connect the LED fixtures, and test the motion sensors. Regular maintenance keeps your system running efficiently, and proper installation techniques guarantee peak performance. Let’s investigate the crucial steps to enhance your solar security setup.
Key Takeaways
- Position solar panels at a 20-30 degree southward tilt with unobstructed sunlight exposure during peak hours for optimal charging.
- Mount LED fixtures strategically to create overlapping light patterns, eliminating dark spots in critical security zones.
- Install motion sensors between 6-10 feet high, ensuring clear detection zones without interference from trees or structures.
- Use weatherproof sealant and appropriate mounting hardware matching your surface material to ensure secure, long-lasting installation.
- Test the complete system before finalizing installation, verifying sensor sensitivity, light coverage, and proper battery connections.
Solar Security Light Components
Solar security lights represent a synergy of five essential components working together to provide reliable illumination.
The monocrystalline solar panel, with its 15-22% efficiency, converts sunlight into power while the charge controller regulates the electrical flow to protect your system.
You’ll find the rechargeable battery‘s capacity directly impacts your light’s runtime, with Lithium-Ion options offering superior performance.
The LED fixture delivers bright, efficient lighting while consuming minimal energy.
Your motion sensor, typically PIR-based, completes the system by triggering illumination when movement is detected, ensuring your security light activates only when needed.
Tools and Materials Needed for Installation
Before beginning your solar security light installation, you’ll need to gather an extensive set of tools and materials to guarantee a successful mounting process.
Start with crucial tools like a drill, screwdrivers, measuring tape, and a level to overcome common installation challenges. Don’t overlook tool safety by equipping yourself with safety glasses, work gloves, and a sturdy ladder.
Your mounting hardware should match your surface material, including appropriate screws, anchors, and weatherproof sealant.
For electrical components, verify you have the solar panel, LED fixture, wiring connectors, and electrical tape.
Consider optional tools like a multimeter and stud finder for improved precision.
Planning Your Lighting Layout
A well-planned lighting layout serves as the foundation for an effective solar security system.

You’ll need to carefully assess your property’s illumination purposes and lighting aesthetics before mounting any fixtures.
Start by mapping your property’s key features and identifying critical security zones.
Consider both functionality and visual appeal when determining fixture placement.
- Measure your total coverage area and calculate lumens needed
- Mark ideal mounting locations on your property sketch
- Plan for overlapping light patterns to eliminate dark spots
- Allow extra capacity for future expansions or landscape changes
Remember to position lights strategically, considering seasonal changes in natural light and avoiding light pollution that could affect neighbors.
Choosing the Perfect Location for Solar Panels
Where you position your solar panels can make or break your security lighting system’s effectiveness. For ideal performance in North America, orient your panels southward, with a tilt angle between 20-30 degrees.
You’ll want unobstructed sunlight exposure, especially during peak hours of 10 a.m. to 2 p.m.
Check your roof’s condition and load capacity before mounting. If your roof isn’t suitable, consider ground installation alternatives.
Avoid areas prone to shade from trees or structures, and factor in seasonal sun path changes. For maximum efficiency, use tools like Google’s Project Sunroof to analyze your location’s solar potential before finalizing panel placement.
Mounting Your Solar Panel System
Once you’ve selected your ideal panel location, proper mounting becomes crucial for system longevity and performance. Choose lightweight aluminum mounting hardware for durability and corrosion resistance, typically costing around 10% of your total system budget.
For best installation, follow these critical steps:
- Install flashing and weatherproof your roof penetrations before securing mounts.
- Set a minimum 10-degree tilt angle to prevent dust accumulation.
- Align panel mounting holes precisely with fixing brackets.
- Route MC4 cables before final mounting to guarantee accessibility.
Remember to tighten bolts symmetrically and verify your chosen tilt angle optimizes energy generation based on your location’s specific conditions.
Installing Security Light Fixtures
Since proper security light placement directly impacts your system’s effectiveness, installing fixtures demands careful attention to both positioning and mounting technique. Different fixture types require specific installation techniques to guarantee peak performance and longevity.
| Task | Tool | Purpose |
|---|---|---|
| Surface Prep | Level | Ensure even mounting |
| Mounting | Drill | Create pilot holes |
| Wiring | Wire strippers | Connect power |
| Sealing | Silicone caulk | Weatherproof |
| Testing | Multimeter | Verify connections |

When mounting your fixtures, you’ll need to maintain proper alignment while securing the mounting bracket. Don’t forget to weatherproof all connections and test the motion detection range before finalizing your installation. Angle adjustments may be necessary to achieve peak coverage for your security needs.
Setting Up Motion Detection Features
Proper motion detection configuration serves as the cornerstone of an effective solar security lighting system. Your motion sensor calibration starts with strategic positioning 6-10 feet high, angled slightly downward for ideal coverage.
For detection zone customization, utilize masking shields to block unwanted areas and minimize false triggers.
Follow these critical setup steps:
- Set sensitivity range between 2-5 meters based on your property’s needs
- Adjust detection angle (120-180°) to cover high-traffic areas
- Configure activation duration from 5 seconds to 5 minutes
- Fine-tune light intensity levels for both dim and full brightness modes
Connect to your smart home system for remote management and customized scheduling.
Testing and Adjusting Your Solar Lights
Testing your newly installed solar security lights demands a systematic approach to guarantee peak performance across all components.
Begin by measuring light intensity at distinct distances after sunset, adjusting lamp heads for ideal coverage. Check sensor sensitivity by walking through different angles, ensuring proper activation without false triggers.
Position your solar panel southward at your latitude angle, removing any obstacles that cast shadows.
Monitor battery performance over 2-3 sunny days, verifying proper charging and runtime. Fine-tune brightness settings and color temperature to match your security needs while maximizing battery efficiency.
Make adjustments until you achieve the perfect balance of illumination and power conservation.
Essential Maintenance Tips
To improve the lifespan and efficiency of your solar security lighting, regular maintenance tasks must become part of your routine upkeep schedule.
Focus on these critical maintenance elements with proper frequency and attention to detail.
- Clean panels every 2-3 months using soft cloth and mild soap, avoiding abrasive materials.
- Check battery connections monthly and replace batteries every 1-2 years, using correct NiMH or Li-ion types.
- Adjust panel positioning seasonally to maintain 6-8 hours of direct sunlight exposure.
- Inspect wiring monthly for wear, ensuring waterproof seals remain intact and components are secure.
During seasonal changes, increase maintenance frequency and apply protective measures against extreme weather conditions.
Common Problems and Quick Fixes
While solar security lighting offers reliable illumination, several common issues can affect its performance and require simple troubleshooting steps. Your common troubleshooting should focus on these key areas for quick resolution:
| Problem Area | Quick Fix |
|---|---|
| Light Output | Clean panels, adjust angle, remove obstructions |
| Battery Issues | Check connections, replace if needed |
| Sensor Problems | Perform sensor calibration, clean sensors |
| Wiring Concerns | Inspect connections, repair damaged wires |
You’ll find most issues resolve through regular maintenance and proper positioning. When LEDs dim or flicker, initially check for debris on panels and verify proper battery connections. If sensor-related problems persist, recalibrate sensitivity settings and verify sensors remain clear of obstructions.
Conclusion
You’ve now equipped yourself with the knowledge to install an efficient solar security lighting system. By following proper mounting techniques, optimizing panel placement for maximum sun exposure, and fine-tuning your motion detection settings, you’ll achieve reliable performance. Regular maintenance of your components and quick troubleshooting of common issues will guarantee your DIY solar security setup continues providing dependable illumination while reducing your energy costs.